🧸 Advanced Resin Toy Fabrication: Master the use of photosensitive resins with precise material selection and color customization to achieve high-fidelity designer toys with superior surface finish and structural integrity.
At TOYYIE, a leading OEM/ODM in premium toy manufacturing, we specialize in leveraging advanced resin technologies to create unique designer toys. This article delves into the technical nuances of resin types, color effects, and model crafting essential for precision resin toy production.
Understanding Resin Materials & Properties 🧪
| Resin Type | Key Characteristics | Applications | Surface Quality |
|---|---|---|---|
| Standard Resin | Versatile, high precision | General designer toy models | Smooth, fine detail |
| Transparent Resin | Clear or semi-transparent | Crystal/glass effect toys | Glossy, visible internal detail |
| Flexible Resin | Elasticity and flexibility | Wearable or bendable toys | Smooth, resilient surface |
| Casting Resin | Optimized for mold casting | Master models for casting | High fidelity, intricate detail |
| Ceramic Resin | Ceramic particle infusion | Ceramic-style designer toys | Matte to semi-gloss, ceramic texture |
Photosensitive Resin Selection and Technical Attributes
Selecting the appropriate photosensitive resin is critical to achieving the desired mechanical and aesthetic properties in resin toy manufacturing. Standard resin offers precision and surface smoothness, while casting resin is tailored for mold master models with superior detail retention. Flexible resins incorporate elasticity, expanding functional possibilities, and ceramic resins simulate ceramic materials for specialized finishes.
TOYYIE Insight: TOYYIE utilizes casting resin with a dimensional accuracy tolerance of ±0.05 mm and surface roughness Ra < 1.6 µm, adhering to EN71-3 standards for heavy metal content.
Advanced Coloration and Optical Effects in Resin Toys
Color customization through pigment blending and incorporation of effect materials like glitter or fluorescent pigments enables designers to produce toys with unique visual dynamics. Precise measurement and homogenous mixing ensure consistent color distribution and retention of transparency, essential for effects such as glow-in-the-dark or crystal-like translucency.
TOYYIE Insight: Our flexible resin formulations achieve Shore A hardness between 70-85, suitable for durable, bendable toy components tested under ASTM D2240.
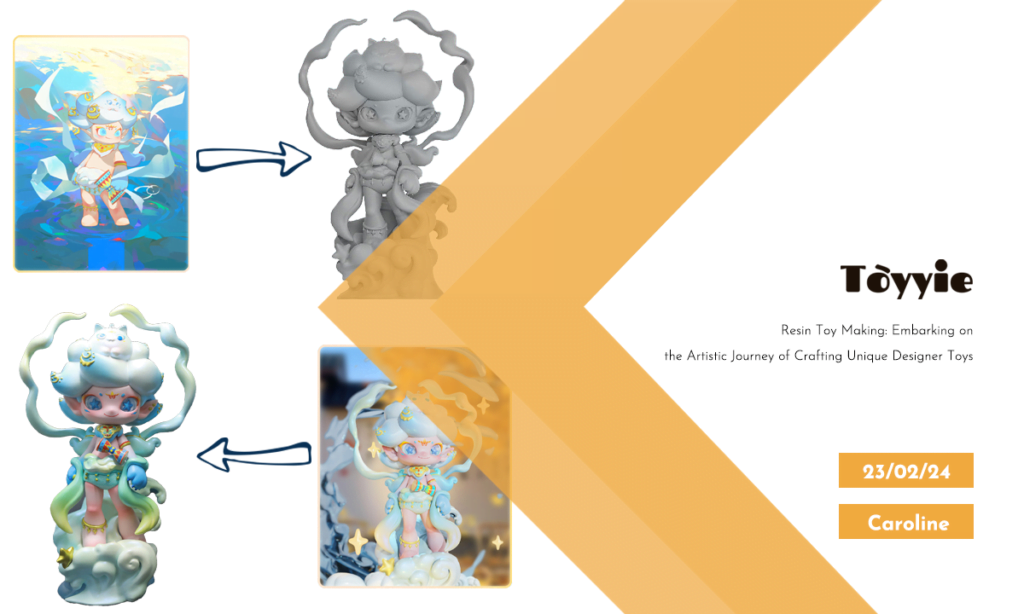
Design and Prototyping Workflow for Resin Toys
The design phase integrates conceptualization—from artistic inspiration to target audience analysis—followed by iterative sketching and feedback loops. Employing rapid prototyping with resin allows for early detection of form and structural issues, enabling refinement before mass production.
Manufacturing Considerations and Quality Compliance
Adhering to ISO 9001 and toy safety standards such as EN71 and ASTM F963 is imperative for resin toy production. Precision in pigment dosing, curing parameters, and post-processing ensures consistent product quality and safety compliance.
TOYYIE Resin Toy Manufacturing Capabilities
- Material Expertise: Comprehensive resin selection tailored for diverse toy applications
- Precision Color Matching: Custom pigment blending with strict quality control
- Advanced Prototyping: High-resolution 3D printing and molding for iterative design validation
- Compliance & Safety: Full adherence to ISO, EN71, and ASTM toy safety standards
- Surface Finishing: Multiple post-processing techniques for smooth, defect-free surfaces
TOYYIE — Your Partner in Premium Resin Toy Production
Leverage TOYYIE’s industry-leading resin expertise and manufacturing precision to bring your unique designer toy concepts to life.
Contact TOYYIE for Expert Consultation →